How to Winterize a House
In This Guide
- When to winterize
- The fall schedule, in priority order
- Exterior water: hoses, faucets, sprinklers
- Interior pipes and the shutoff valve
- Gutters, roof, and drainage
- Heating system and thermostat
- Sealing drafts and the building envelope
- Detectors, fans, and power
- What winterizing costs
- The tasks homeowners skip most
- FAQs
Winterizing a house is the process of preparing plumbing, heating, and the building envelope to survive sustained freezing temperatures without damage. The order matters: water first, heat second, envelope third. A burst pipe can flood a home in hours; a draughty window, annoying as it is, will not. This guide follows that order, so if you run out of weekends, you will have done the jobs that prevent the most damage first.
When to Winterize
A hard freeze — temperatures at or below 28°F (−2°C) for several hours — is the trigger, not the calendar. Average first-freeze dates range from mid-October in the Upper Midwest and Mountain West of the US and across much of Canada, to late November along the Gulf Coast. Warm regions rarely need full winterization at all, and their homeowners should skip the freezing-pipe sections rather than following them out of habit.
The practical rule: finish all exterior water tasks about two weeks before your area’s average first freeze. Weather forecasts are unreliable beyond about 10 days, and a single early freeze can burst an unprotected hose bibb. Heating-system service should be booked even earlier — HVAC companies fill their fall schedules by mid-September in many markets. When overnight lows start dipping into the upper 30s Fahrenheit consistently, treat that as your final window: roughly two to three weeks before the first hard freeze in most cold climates.
The Fall Schedule, in Priority Order
| Priority | Task | Do by | DIY or pro |
|---|---|---|---|
| 1 | Disconnect garden hoses; shut off and drain exterior faucets | Early fall | DIY (about 30 minutes) |
| 2 | Schedule heating tune-up | Book by mid-September; service by October | Licensed pro |
| 3 | Winterize sprinkler / irrigation system (blowout) | Early to mid fall | Pro recommended |
| 4 | Clean gutters after final leaf drop | Late fall | DIY or pro |
| 5 | Insulate exposed pipes (crawl space, garage, attic) | Fall | DIY (1–2 hours) |
| 6 | Replace heating filter; test thermostat | Fall | DIY (about 15 minutes) |
| 7 | Seal drafts: weatherstrip doors, caulk window gaps | Fall | DIY (half a day) |
| 8 | Test smoke and carbon monoxide detectors | Fall | DIY (about 10 minutes) |
| 9 | Locate and label the main water shutoff valve | Fall | DIY (5 minutes) |
| 10 | Reverse ceiling fans to push warm air down (low speed) | Late fall | DIY (5 minutes) |
Exterior Water: Hoses, Faucets, and Sprinklers
Disconnect hoses and shut off exterior faucets
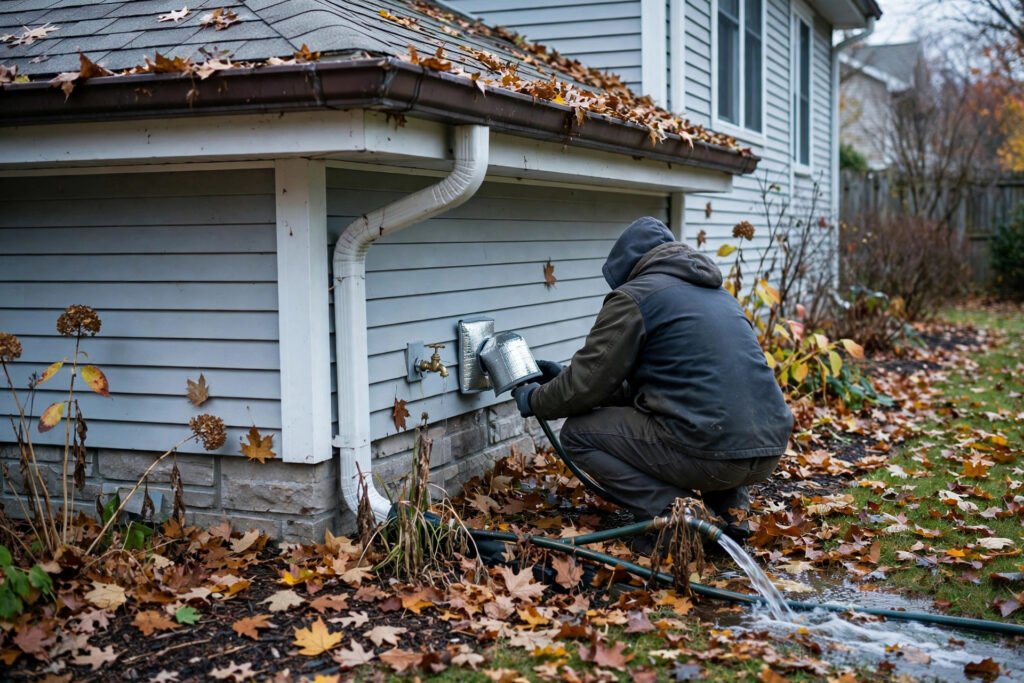
A garden hose left attached traps water in the faucet body. When that water freezes, it expands back into the pipe inside the wall — the classic burst-pipe scenario. Remove every hose, drain it, and store it indoors. Then shut off the interior valve feeding each exterior faucet (usually in the basement or crawl space), open the outside faucet to drain, and leave it open through winter. Foam faucet covers, sold for a few dollars each, add insulation over hose bibbs for extra protection.
Winterize the sprinkler system
Underground irrigation lines hold water that will crack pipes and damage valves and sprinkler heads when it freezes. A proper winterization uses compressed air to blow out every zone — do not skip this if you live where the ground freezes. DIY blowout requires an air compressor with a regulator and eye protection, and it must respect strict pressure limits: do not exceed 50 PSI for polyethylene (poly) pipe or 80 PSI for PVC pipe, confirmed across multiple irrigation guides. Blow out one zone at a time in short cycles, starting with the zone farthest from the compressor, and never force air into a closed system.
Even if you skip the blowout, shut off the system’s water supply and drain the backflow preventer. Some backflow devices must be removed and stored indoors for winter under local code — check your device manual or local rules.
Shut off water to outbuildings
Garden sheds with sinks, pool houses, and detached garages with plumbing need the same treatment: shut off, drain, and leave taps open. Pipes in unheated outbuildings freeze first because they get no residual heat from the house.
Interior Pipes and the Shutoff Valve
Insulate exposed pipes in crawl spaces, garages, attics, and along exterior walls with foam pipe sleeves, which are inexpensive and cut to length with a utility knife. Pay special attention to pipes in unheated areas and to any pipe that has frozen before — it will freeze again in the same place.
Find your main water shutoff valve now and label it. If a pipe bursts in January, the difference between a small flood and a ruined floor is how fast someone can shut the water off. Every adult in the household should know where it is. During severe cold snaps, letting a faucet on an exterior wall drip slightly and keeping cabinet doors open under sinks on exterior walls can help, but these are stopgaps, not substitutes for insulation and shutoff preparation.
If you leave the house empty for winter, winterizing goes further: drain the plumbing system, add non-toxic antifreeze to traps where local guidance allows, and set the thermostat no lower than the level your heating contractor recommends for an empty home. Vacant-home winterization is worth a plumber’s visit, because a missed trap or line can still burst.
Gutters, Roof, and Drainage
Clean gutters once leaves are mostly down, then check that downspouts discharge well away from the foundation. Clogged gutters overflow, and overflow water saturates fascia boards and foundations — then freezes, expanding cracks in both. Worse, clogged gutters are a leading cause of ice dams: meltwater that refreezes at the eaves, backs up under shingles, and leaks into the attic. A second cleaning in early spring catches winter debris.
Inspect the roof from the ground with binoculars: missing shingles, lifted flashing, and cracked vent boots become active leaks under snow load. Do not climb a wet fall roof; flag anything visible and get a roofer out before the first snow, because emergency winter roof repairs cost far more than fair-weather ones. Walk the foundation after rain and confirm soil still slopes away from the house rather than pooling against it.
Heating System and Thermostat
For US and Canadian homes with a forced-air furnace, fall service means a professional tune-up plus the homeowner checks in our fall furnace maintenance checklist: filter, thermostat test, vents clear, carbon monoxide alarms tested. For UK homes, the equivalent is an annual boiler service by a Gas Safe registered engineer — do not apply furnace steps to a boiler, and do not skip the boiler service because you read a furnace guide.
Test the thermostat before you need heat: switch to heat mode, raise the setpoint a few degrees above room temperature, and confirm the system fires within a minute or so. If it does not, check thermostat batteries, the circuit breaker, and the furnace power switch (often a standard light switch on the unit) before calling for service. A brief dusty smell on the first fall run is normal as dust burns off; a persistent smell — especially a rotten-egg smell, which can indicate a gas leak — means shut the system down, ventilate, get out if the smell is strong, and call your gas utility or a technician. Never ignore a gas smell.
Sealing Drafts and the Building Envelope
Weatherstrip doors and seal window gaps with caulk where the frame meets the wall, and with removable rope caulk or window film on windows you will not open all winter. Check attic or loft insulation: in cold climates, heat escaping into the roof space drives ice dams, so insulation and ventilation matter as much as sealing. In the UK, the same job is usually called draught-proofing, and the materials are the same.
Reverse ceiling fans to run clockwise on low speed in winter, so they push warm air that has risen to the ceiling gently back down the walls instead of creating a cooling breeze. It is a five-minute job — most fans have a small direction switch on the motor housing — and it makes rooms feel warmer without touching the thermostat.
Detectors, Fans, and Power
Test every smoke and carbon monoxide alarm in fall, replace batteries, and replace any unit past its manufacturer’s end-of-life date (smoke alarms every 10 years; carbon monoxide alarms roughly every 5–7 years). Carbon monoxide alarms belong on every level and outside sleeping areas. If a carbon monoxide alarm sounds, get everyone outside to fresh air and call emergency services; do not try to find the source yourself first.
Test a generator before you need it, outdoors only, well away from doors, windows, and vents. Stock the basics before the first storm: flashlights, batteries, a snow shovel, ice melt that is safe for your walkways, and the phone number of your heating contractor and gas utility. If you have a fireplace, book its annual inspection and sweep before the season, because creosote buildup is a fire hazard.
What Winterizing Costs
Most winterizing is DIY-cheap: foam pipe sleeves, faucet covers, weatherstripping, caulk, and a filter together usually cost less than a single emergency callout. The paid jobs are the ones worth paying for: a professional heating tune-up (see the furnace guide for current US price ranges, which vary by city and system), a sprinkler blowout by an irrigation technician (get a local quote; prices vary by zone count and region), and a chimney sweep where you burn wood. Budget for those three as a fall package, and treat anything else — insulation top-ups, a new thermostat, gutter guards — as a separate project with its own quote.
Costs vary by region and city, and by whether you hire or DIY. What does not vary is the economics of prevention: a burst pipe, a flooded basement, or a heating failure in a cold snap costs far more than the fall afternoon that prevents it.
The Tasks Homeowners Skip Most
- The sprinkler blowout — invisible, underground, and easy to forget until spring reveals cracked heads and valves.
- The main shutoff location — nobody looks for it until water is already on the floor.
- Heating service booked late — waiting until the first cold snap puts you behind breakdown emergencies.
- Gutter cleaning after the final leaf drop — cleaning too early just means leaves fill them again.
- Detector batteries and end-of-life dates — a chirping alarm at 2 a.m. in January is a warning that was due in October.
For the year-round version of this routine, see our home maintenance checklist, and for the heating deep-dive, our fall furnace maintenance checklist. Plumbing checks that overlap with winterizing — leaks under sinks, running toilets — are covered in our plumbing repair guides, including how to fix a running toilet.
Winterizing FAQs
When should I winterize my house?
Start in early fall and finish about two weeks before your area’s average first hard freeze (28°F / −2°C or below for several hours). Book heating service by mid-September, because fall schedules fill early.
What is the most important winterizing task?
Shutting off and draining exterior water lines. A burst pipe is the costliest common winter failure, and it is prevented by a 30-minute job: disconnect hoses, shut off the interior valve, open the outside faucet, and leave it open.
Do I need to winterize my sprinkler system?
Yes, if you live where the ground freezes. Blow out every zone with compressed air, respecting the pressure limits for your pipe type (50 PSI for poly, 80 PSI for PVC), or hire an irrigation technician. Shut off the water supply and drain the backflow preventer even if you skip the blowout.
Does this guide apply to the UK?
In part. Draft sealing, gutter cleaning, pipe insulation, and detector checks apply in cold parts of the UK. The heating section does not transfer directly: UK homes heat with boilers, not furnaces, so book a boiler service by a Gas Safe registered engineer instead of a furnace tune-up.
Does this guide apply to Australia?
Mostly no, except in genuinely cold regions. Warm-climate Australian homes do not need full winterization; the freezing-pipe, sprinkler-blowout, and heating-tune-up sections are written for US and Canadian cold climates.
What temperature do pipes freeze at?
Water freezes at 32°F / 0°C, but pipes usually burst after sustained cold below that, especially in unheated spaces and along exterior walls. The practical trigger for winterizing is the first hard freeze, around 28°F / −2°C for several hours, not a single night at freezing point.
Should I leave faucets dripping in a cold snap?
A slight drip from a faucet on an exterior wall and open cabinet doors under sinks on exterior walls can help during severe cold, but they are stopgaps. Insulation, shutoff preparation, and a serviced heating system are the real protection.
What should I do if a pipe bursts?
Shut off the main water supply immediately, open faucets to drain the system, move valuables and electrics away from the water, and call a plumber. Do not touch electrics standing in water. This is why locating the shutoff valve in fall matters.
Related: Home maintenance checklist · Fall furnace maintenance checklist · Plumbing repair guides