
How to Paint Kitchen Cabinets So the Finish Actually Lasts
In This Guide
Painting kitchen cabinets is the cheapest way to make a tired kitchen look new, and it is a job most careful beginners can finish over a long weekend. The catch is that a painted cabinet lives or dies on its preparation. Grease, gloss and skipped steps are what turn a fresh coat into a peeling mess a few months later. Get the prep right and the finish can look close to factory-sprayed and hold up for years.
This guide follows the step order used by manufacturer guides and experienced DIY writers alike: remove, clean, sand, prime, paint thin, cure. Follow the drying and recoat times on the exact products you buy, because they vary by brand and product. Where this guide gives a time range, it is a planning range across products, not a substitute for the label on your can.
Paint, Reface or Replace? A 60-Second Check
Paint is the right call when the cabinet boxes are sound, the doors are square, the hinges work, and your complaint is colour or style. You keep the same layout and door style, and you spend a fraction of replacement cost.
Paint is the wrong call when the boxes are swollen from water damage, panels are warped, doors will not align, or you want a different layout. A beautiful finish on a failing box is money spent twice. In that case, compare refacing (new doors and veneer on sound boxes, commonly $4,000–$9,500 professionally) with full replacement (commonly $8,000–$25,000+ for new cabinets, and far more for high-end custom work). Check the sink cabinet first: it is where leaks do their damage. If that box is soft or swollen, fix the leak and the box before you think about paint.
Renters should get landlord permission in writing before painting. Owners in a condo or co-op should check building rules on work hours, fumes and debris. Painting is cosmetic work and usually needs no building permit, but building rules still apply.
What You Will Need
- Screwdriver or cordless drill/driver, plus small bags and masking tape for labelling hardware
- Degreaser: TSP substitute or a strong household degreaser, plus clean rags and a bucket
- Sandpaper: 120–150-grit for initial scuffing on glossy finishes, 180–220-grit for general scuff-sanding, 220-grit or a fine sanding sponge between coats
- Wood filler, a putty knife, vacuum, tack cloth
- Bonding primer (for slick or previously finished surfaces) or stain-blocking primer (for stained wood, knots or old stains); shellac-based primer dries fast and blocks stains well but needs good ventilation
- Cabinet-grade enamel: acrylic, alkyd or hybrid urethane enamel made for cabinets and trim — not ordinary interior wall paint
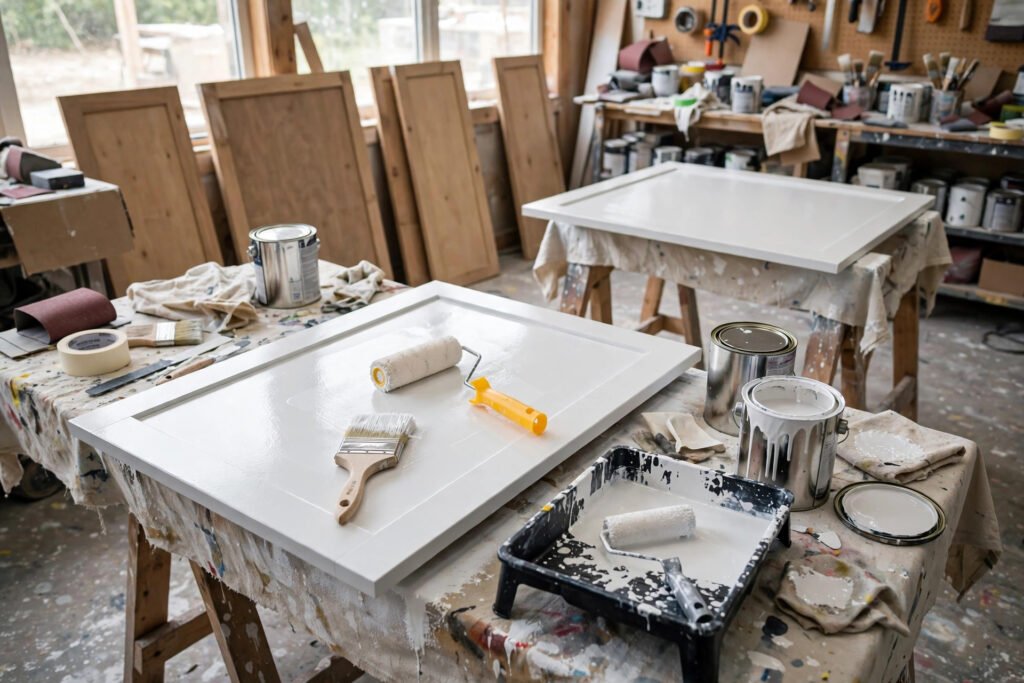
- High-quality angled brush, small microfibre or foam roller (quarter-inch nap), paint tray, painter’s tape, drop cloths
- Sawhorses or a flat painting station, plus painter’s pyramids or screws through scrap wood if you want to paint both sides without waiting
- Safety gear: gloves, eye protection, dust mask or respirator for sanding, and ventilation (open windows, fan) for priming and painting
Step 1: Remove and Label Everything
- Empty the cabinets and clear the countertops. Cover countertops, floors and appliances with drop cloths.
- Remove doors, drawer fronts and all hardware — hinges, knobs, pulls and screws. Keep each door’s screws in a labelled bag taped to that door, or number the doors and bags to match.
- Label the backs of doors with painter’s tape: “upper left 1”, “upper left 2”, and so on. Doors that look identical often are not, and hinge holes will not line up if you swap two doors.
- Remove shelf paper and clean out crumbs and grease from inside the boxes while you have access, even though you are only painting the outside.
Set up a painting station in a garage, spare room or covered outdoor area if the weather allows. Paint doors flat, on saw horses, so paint cannot run. Paint the backs first, let them dry, then flip and paint the fronts, so the visible side gets the freshest, least-handled finish.
Step 2: Clean and Degrease Before You Sand
Degrease before you sand, not after. Cooking grease clogs sandpaper, and sanding over grease just pushes it into the surface, where it blocks adhesion. Scrub every surface you plan to paint — doors, drawer fronts, face frames, end panels — with a TSP substitute or degreaser mixed exactly as the label directs. Pay extra attention around handles, above the stove and near the sink, where hands and steam leave the most residue.
Rinse with clean water, wipe dry, and let surfaces dry fully. Wear gloves and eye protection when using TSP or strong degreasers, and ventilate the room. If a surface still feels slick or the primer beads up later, it was not clean enough. Clean it again rather than pushing on and hoping the primer will compensate.
Step 3: Sand, Fill and Sand Again
Scuff-sand every surface with 180–220-grit sandpaper, following the wood grain. You are not trying to strip the old finish down to bare wood. You are dulling the gloss and giving the primer something to grip. On very glossy finishes, start with 120–150-grit to break the sheen, then smooth with 220-grit.
Fill dents, dings and old hardware holes with wood filler, not caulk. Let the filler dry as the label directs, then sand it smooth and flush. Vacuum all dust, then wipe with a tack cloth. Paint does not stick well to dust, so take your time with this step. Any dust left on the surface will show in the finish.
Step 4: Prime
Prime in almost every case. Manufacturer data sheets for cabinet enamels call for fully primed new surfaces and primed or spot-primed previously painted surfaces. Primer does three jobs: it bonds to the old surface, it seals stains and tannins so they do not bleed through, and it gives the topcoat a uniform base so colour looks even.
- Bonding primer for slick surfaces: laminate, melamine, thermofoil and glossy factory finishes.
- Stain-blocking primer for wood with knots, water stains or dark stain that could bleed through a light topcoat. Shellac-based primer is the strongest stain blocker and dries in under an hour, but it smells strongly and needs alcohol cleanup and good ventilation.
- One coat is often enough on a clean, well-prepped surface; two coats are sensible if the old colour is dark or stains show through the first coat.
Brush primer into corners and details first, then roll the flat areas with a microfibre roller. Let it dry as the label directs — some bonding primers can be topcoated in 3–4 hours, others need longer — then scuff-sand lightly with 220-grit, vacuum and tack off the dust. Sanding the primer after a longer dry gives a smoother base for the topcoat.
Step 5: Paint Two Thin Coats
Two thin coats beat one thick coat every time. Thick coats run, sag, show brush marks, take longer to cure and are more prone to cracking. Thin coats level out, dry evenly and build a harder film.
- Stir, do not shake, the paint if the label says so, to avoid bubbles. Pour a small amount into a tray rather than working from the full can.
- Cut in edges and details with the brush, then roll flat areas with the microfibre roller. Work in long, even strokes and do not over-brush — going back over paint that has started to set creates drag marks.
- Check for drips before you walk away. Look at edges and the bottoms of doors, where paint pools, and smooth any runs while the paint is still wet.
- Let the first coat dry fully before recoating. Recoat windows vary a lot: some cabinet enamels allow recoating in 4–6 hours, while one widely used cabinet enamel requires a 16-hour recoat window. Read your label and plan for the next morning rather than the same evening if your product needs it.
- Scuff-sand lightly between coats with 220-grit, vacuum and tack off, then apply the second coat the same way.
Spraying gives the smoothest, most factory-like finish, but it needs a sprayer, a spray booth or well-masked area, and practice. Brushing and rolling with a good enamel and a microfibre roller gives a very good finish for most DIY kitchens, with some visible texture on close inspection. If a flawless sprayed look matters more than saving money, get a professional spraying quote and compare it with the DIY saving.
Step 6: Cure, Rehang and Care
Dry to the touch is not the same as cured. Acrylic latex paints may feel dry in hours, but full hardness takes much longer. Guides commonly advise avoiding heavy use for 5–7 days, treating the finish gently for 2–4 weeks, and allowing up to 30 days for full cure on some enamels. One professional guide advises being careful around cabinets for 30 days as they cure, after which the finish hardens and becomes durable.
- Rehang doors gently after the paint is dry enough to handle — often after 24–72 hours, depending on the product — but do not slam them, stack dishes against them, or scrub them during the cure period.
- Use the original hinge holes and labels. Drill new pilot holes only if you are moving hardware to a new position.
- Clean with mild soap and water and a soft cloth. Skip abrasive cleaners and scouring pads, which dull the sheen and wear the edges first.
- Touch up chips promptly with a small brush, before moisture gets under the film and lifts more paint.
With proper prep, bonding primer and cabinet enamel, painted cabinets often hold up well for years, and professional refinishes are commonly described as lasting 5–10 years or more on solid wood with good care. Laminate and thermofoil repaints tend to last less long, especially in high-moisture spots near the sink and stove. Gentle cleaning and prompt chip repair are what stretch that life.
Can You Paint Kitchen Cabinets Without Sanding?
You can skip heavy sanding, but you cannot skip preparation. The “no-sand” method still requires thorough degreasing, a liquid de-glosser on glossy finishes, and a bonding primer made for slick surfaces. Some guides report that no-sand finishes on laminate can last 3–5 years, against 7–10 years for a sanded job, though results vary with product quality, use and moisture. A light scuff-sand is cheap insurance: it takes far less time than a full strip, and it gives the primer a mechanical grip that chemistry alone cannot guarantee.
Thermofoil needs extra caution. Thermofoil is a plastic film wrapped over a substrate, and heat can make it bubble or peel. If the film is already lifting, peeling or bubbling, paint will not fix it — the film will keep lifting under the paint. Test a hidden spot first, and consider replacing those doors or hiring a pro if the surface is already failing. Laminate, by contrast, paints well with cleaning, scuff-sanding and a bonding primer designed for slick surfaces.
Mistakes That Cause Peeling
- Painting over grease. The most common cause of peeling. If the surface feels slick after cleaning, clean it again.
- Using wall paint or ordinary primer on slick surfaces. Standard primers do not bond to non-porous laminate or glossy lacquer the way a bonding primer does.
- One thick coat instead of two thin ones. Thick paint cures slowly, cracks easily and shows every brush mark.
- Reassembling too soon. Handling, stacking or slamming doors before the paint has cured causes micro-cracks that grow into peeling.
- Skipping the cure period. Scrubbing, hanging wet towels or leaning heavy items on fresh paint during the first weeks damages a finish that would otherwise have hardened well.
- Painting damaged boxes. Water damage, warping and swollen panels will not be fixed by paint, and the finish will fail with the substrate.
Painting Kitchen Cabinets FAQs
Do you need to prime before painting kitchen cabinets?
Yes, in almost every case. Use a bonding primer on slick or glossy surfaces and a stain-blocking primer on stained wood or surfaces with knots or water stains. Primer bonds the topcoat to the old surface, seals stains and gives an even base colour.
What kind of paint should I use on kitchen cabinets?
Use a cabinet-grade enamel — acrylic, alkyd or hybrid urethane enamel made for cabinets and trim — not ordinary wall paint. Cabinet enamel levels smoother, resists blocking so doors do not stick to frames, and stands up to handling and cleaning far better than wall paint.
How long does it take to paint kitchen cabinets?
Plan a long weekend for the active work: a day for removal, cleaning and sanding, a day for priming and the first coat, and a day for the second coat and careful rehanging. Then allow 1–2 weeks of gentle use, and up to 30 days for full cure on some products, before scrubbing or heavy use.
Can I paint laminate cabinets?
Yes, with thorough cleaning, scuff-sanding and a bonding primer designed for slick surfaces, followed by two thin coats of cabinet enamel. Test a hidden spot first. Thermofoil is riskier: if the film is already lifting or bubbling, painting will not hold, and those doors may need replacing.
Do I need to sand cabinets before painting?
A light scuff-sand with 180–220-grit sandpaper is strongly recommended, even if you use a bonding primer. You are dulling the gloss and giving the primer grip, not stripping to bare wood. Skipping sanding entirely is possible on sound surfaces with a bonding primer, but the finish may not last as long.
How long do painted kitchen cabinets last?
With proper prep, bonding primer and cabinet enamel, painted cabinets often hold up well for years. Professional refinishes on solid wood are commonly described as lasting 5–10 years or more with gentle care. Laminate repaints tend to last less long, and all finishes last longer with mild cleaning and prompt chip repair.
Should I spray or brush and roll kitchen cabinets?
Spraying gives the smoothest, most factory-like finish but needs equipment, masking and practice. Brushing and rolling with a quality enamel and microfibre roller gives a very good DIY finish with slight texture on close inspection. Choose spraying if a flawless finish matters most, and brushing and rolling if budget and simplicity matter more.
Related: More painting and decorating guides · Kitchen remodeling ideas · Kitchen and bathroom cost guides · Tools you will need for the job · Bathroom remodeling guides