How to Insulate an Attic: R-Values, Batts, and Blown-In Insulation
In This Guide
- Quick answer
- Scope: US & Canada (and the UK equivalent)
- What R-value do you need?
- Assess what you already have
- Step 1: Air-seal before you insulate
- Step 2: Protect vents and clearances
- Step 3a: Installing batts
- Step 3b: Blown-in loose fill
- Step 3c: Spray foam (usually a pro job)
- Step 4: Insulate the attic hatch
- What attic insulation costs
- Mistakes to avoid
- FAQs
Attic insulation is widely considered one of the highest-payoff home improvements: heat rises, and an under-insulated attic is a hole in the top of your house all winter — and a heat trap all summer. The work itself is not complicated, but the order of operations is everything. Insulation slows heat movement through materials; it does not stop air leaks, and it must not block the ventilation that keeps the roof dry. Get those two things right and the insulation itself is straightforward.
Scope: US & Canada (and the UK Equivalent)
This guide uses US and Canadian framing: attics, R-values, and climate zones. If you are in the UK, you are looking for the same job under a different name — loft insulation. The principles are identical (insulate the loft floor, keep ventilation paths clear, mind clearances around lights and flues), but UK guidance uses U-values and different recommended depths and materials, and UK homes typically have cold-water tanks and pipes in the loft that need lagging too. A dedicated UK loft-insulation guide is on our publishing calendar; this article should not be read as UK guidance.
What R-Value Do You Need?
R-value measures thermal resistance: higher means better insulation. The US Department of Energy’s commonly cited attic targets, reflected across 2026 cost and how-to guides, are:
- Warm climates (DOE zone 1): about R-30.
- Moderate climates (zones 2–3): about R-38 to R-49.
- Cold climates (zones 4–8): about R-49 to R-60 (the 2021 IECC code minimum is R-49 in zones 2–3 and R-60 in zones 4–8 for new construction).
For a typical home in a moderate climate that already has R-19 to R-30, the straightforward move is topping up to R-38 to R-49. Your local building code is the final authority — it is free to check, and it reflects your climate zone exactly. Depth is how R-value translates to the real world: for blown-in cellulose, roughly 9 inches gives R-30, about 11 inches gives R-38, and about 14–15 inches gives R-49 (depths settle slightly over time, so installers often blow a little extra). Fiberglass needs more depth for the same R-value because it delivers less R per inch (about 2.2–2.7 per inch blown-in, versus about 3.2–3.8 for cellulose).
Assess What You Already Have
Before buying anything, look in the attic:
- Measure existing depth in several spots with a ruler. Uneven depth tells you where the old insulation has settled or been disturbed.
- Identify the material — fiberglass batts, blown-in fiberglass, or cellulose (gray, papery fibers). You can usually blow new material over old batts.
- Check for problems first: active roof leaks, mold on the roof deck, pest damage, or charred wiring. Fix those before insulating — new insulation over an active leak just hides it.
- Note the ventilation: soffit vents at the eaves and a ridge vent (or gable vents) at the top. You will need to keep those air paths open.
Step 1: Air-Seal Before You Insulate
Insulation slows heat moving through materials, but air leaks go around it. Sealing gaps around ductwork, wiring penetrations, plumbing vents, and the attic hatch before insulating makes a real difference — some guides estimate on the order of 10–15% better performance — and it is far harder to do after the new insulation is down. Use caulk for small gaps and expanding foam for larger ones, and seal around the tops of interior walls where they meet the attic floor. Professional air sealing typically adds about $300–$1,500 to a job, but it is the single most skipped step in DIY attic work.
Step 2: Protect Vents and Clearances
Two non-negotiables before any insulation goes down:
- Keep soffit vents clear. Airflow from the soffits up to the ridge vent keeps the roof cool, prevents ice dams in winter, and carries moisture out. Covering soffit vents with batts is one of the most common attic mistakes. Staple plastic or foam baffles (rafter vents) to the roof sheathing near the eaves to hold insulation back and maintain the air channel.
- Keep clearances around heat sources. Do not let insulation touch chimneys, furnace flues, or non-IC-rated recessed lights. Use fire-rated covers or hardware cloth to maintain a safe gap (about 3 inches is the commonly cited clearance) around these heat sources — this is a fire-safety rule, not a suggestion.
At the eaves, where the roof slope meets the wall plate, use short pieces of batt as blocks to keep blown-in insulation from filtering down into the soffit space and leaving gaps.
Step 3a: Installing Batts
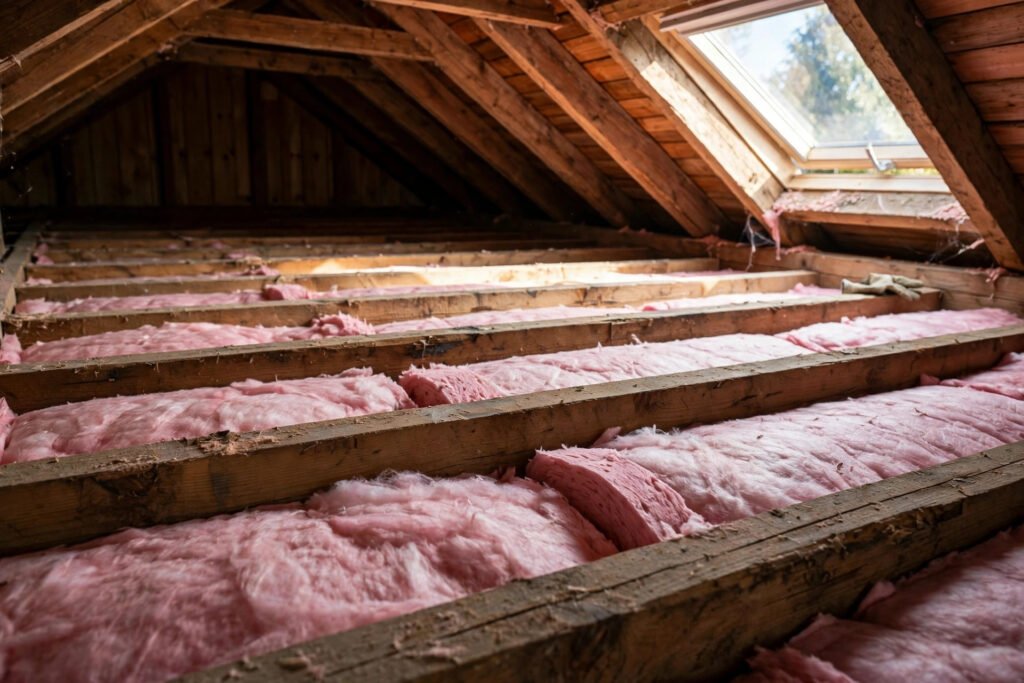
Fiberglass batts are the most DIY-friendly option, and the method used by This Old House is the standard one:
- Carry unfaced R-38 batts into the attic. Use unfaced batts for a second layer — a second vapor barrier can trap moisture between layers.
- Lay the new batts perpendicular to the existing layer (across the ceiling joists), covering the old insulation. The cross-direction covers gaps in the lower layer and reduces thermal bridging through the joists.
- Butt joints tightly. Press batts snugly together at every edge and end joint, with no gaps and no overlaps.
- Cut, never stuff. Cut batts to fit around ducts, pipes, and wiring with a sharp utility knife. Compressing insulation crushes the air pockets that do the insulating, so stuffed batts insulate worse, not better.
- At the perimeter, run insulation up to the roof rafters but keep it away from the roof sheathing itself, and never block the soffit baffles.
Batts come pre-cut for standard joist spacing, and a typical attic takes a few hours of steady work — one well-known guide estimates 2–4 hours depending on attic size, though first-timers should allow a full day.
Step 3b: Blown-In Loose Fill
Blown-in fiberglass or cellulose is the go-to choice for retrofit attics because loose fibers fill gaps and odd corners that batts cannot reach, giving better coverage per dollar in most retrofit jobs. The process:
- Rent the blower. Home centers and rental yards rent insulation blowers, often free with a minimum bag purchase. You will need a helper: one person feeds the machine (usually outside or in the garage) while the other directs the hose in the attic.
- Set depth markers. Staple depth gauges or mark rulers around the attic at your target depth so you can check as you go, then rake the material smooth at that depth.
- Work from the far end back toward the hatch so you never have to walk through fresh insulation.
- Blow evenly between joists to the target depth, keeping the baffles and clearances from Step 2 intact.
Cellulose delivers more R-value per inch than fiberglass, so it needs less depth for the same target — one practical reason it is popular for top-ups. Note that blown-in material settles somewhat over time; installers account for this by blowing slightly above the nominal depth.
Step 3c: Spray Foam (Usually a Pro Job)
Spray foam under the roof deck (rather than on the attic floor) creates an unvented, conditioned attic — a different system entirely, and the right call mainly when ducts or an air handler live in the attic. It costs several times more per R-value than blown-in (open-cell roughly $3.50–$5.50 per square foot installed, closed-cell roughly $5.00–$7.00, versus $1–$3 for blown-in), requires specialist equipment and ventilation during application, and is not a typical DIY job. If your ducts are in the attic and your energy bills are high, get quotes for both approaches before deciding.
Step 4: Insulate the Attic Hatch
The attic opening is a major heat-loss path that is easy to forget. Cut rigid foam board to fit the attic-facing side of the hatch and secure it with adhesive caulk or expanding foam; for pull-down stairs, use an insulated tent cover or build an insulated box around the opening, sealed with weatherstripping. A well-insulated attic with a bare hatch still leaks like a chimney.
What Attic Insulation Costs
- Typical professional job: about $1,700–$2,500 for a standard attic (HomeAdvisor/Angi 2026 figures), or roughly $1–$3 per square foot installed for most materials.
- Blown-in fiberglass: roughly $1.00–$2.50 per square foot installed; blown-in cellulose: roughly $1.10–$2.80.
- Batt (fiberglass): roughly $2–$4 per square foot installed.
- Spray foam: roughly $3.50–$7.00 per square foot depending on open- or closed-cell.
- Extras to budget for: air sealing ($300–$1,500), removal of contaminated or old insulation ($1.00–$3.00 per square foot), and mold remediation if found ($10–$25 per square foot in cited guides).
Costs vary with attic size, access, climate-zone R-value target, and region — colder climates need more material, and difficult access (tiny hatches, vaulted ceilings) adds labor. Get two or three local quotes that state the target R-value and material, not just a total price: “$1.50 a square foot” means nothing until you know whether it buys R-19 or R-60.
Mistakes to Avoid
- Insulating before air-sealing. Air leaks bypass insulation entirely.
- Blocking soffit or ridge vents. Trapped moisture rots wood and grows mold.
- Compressing batts. Crushed insulation insulates worse.
- Adding a second vapor barrier. Use unfaced batts for the top-up layer.
- Covering non-IC-rated lights or flues. A fire risk, not a shortcut.
- Forgetting the hatch. An uninsulated opening undoes much of the job.
- Ignoring existing problems. Leaks, mold, and pests must be fixed first.
Attic Insulation FAQs
What R-value should attic insulation be?
For most US homes: about R-30 in warm climates, R-38 to R-49 in moderate climates, and R-49 to R-60 in cold climates. Check your local building code for the exact requirement in your climate zone.
Is blown-in or batt insulation better for an attic?
Blown-in loose fill usually wins for retrofits because it fills gaps and corners batts cannot reach, giving better coverage per dollar. Batts are easier for a DIYer to install in an open, accessible attic. Either works if installed to the right depth without compression or gaps.
Can I add new insulation over old insulation?
Yes, in most cases — roll back or leave the old batts and blow cellulose over them, or lay new unfaced batts perpendicular to the old layer. Remove old insulation first only if it is wet, moldy, pest-damaged, or contaminated.
Should I block soffit vents when insulating?
No — never. Airflow from soffits to the ridge vent keeps the roof cool, prevents ice dams, and carries moisture out. Use baffles (rafter vents) to hold insulation back and keep the air channel open.
How much does attic insulation cost?
Most homeowners pay about $1,700–$2,500 for a professional attic job, or roughly $1–$3 per square foot installed for blown-in or batt insulation. Spray foam costs several times more. Air sealing and old-insulation removal are common extras.
Can I insulate my attic myself?
Batts and blown-in top-ups are realistic DIY jobs for an accessible attic, with proper protective gear and a plywood walking surface. Hire a pro for spray foam, for attics with mold, leaks, or possible asbestos, and for any electrical or structural concerns.
What is the UK equivalent of attic insulation?
In the UK the same job is called loft insulation. The principles match — insulate the loft floor, keep ventilation paths clear — but UK guidance uses different recommended depths and standards, and UK lofts often contain cold-water tanks and pipes that need lagging. Look for a dedicated UK loft-insulation guide rather than applying US R-values directly.
Related: Home maintenance guides · Cost guides · Tools & DIY skills · Outdoor & Garden hub